Family Chocolate Cake- Recipe

Okies…the final recipe for the week 🙂 Here’s a new recipe I tried out last weekend. It’s a chocolate cake with chocolate icing!! Double yummy!

Want to make one (or more) for yourself…here you go!

Family Chocolate Cake

Note: I am really sorry but I forgot to take a pic of the finished cake…I remembered only after all of us at home had eaten our share so it’s a half eaten cake pic *sheepish grin*

FAMILY CHOCOLATE CAKE

Ingredients for the Cake

Softened Butter               125 grams

Sugar                                    2/3 cup

Icing Sugar                         1/2 cup

Self-raising flour               1 and 1/4 cups

Cocoa                                    1/2 cup

Soda Bicarbonate             1 teaspoon

Salt                                          a pinch

Eggs                                        2

Milk                                         1 cup

Vanilla extract                    1 teaspoon

How to Make the Cake

  1. Preheat the oven to 180 degrees C.
  2. Lightly grease and flour a 23-cm cake tin.
  3. Cream butter with sugar and icing sugar.
  4. Sift flour, cocoa, soda bicarbonate and salt into a separate bowl.
  5. Add the flour mixture, spoon-by-spoon to the creamed butter and sugar mix. Add the remaining ingredients and beat well.( I used an electric blender at low speed.)
  6. Spoon into the prepared cake tin and bake for 40 to 55 minutes or until cooked.
  7. Ice with Chocolate icing when cold.
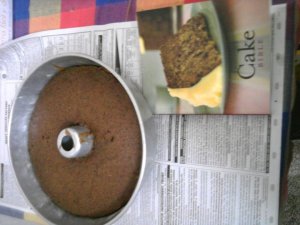
Plain Chocolate Cake

Ingredients for the Chocolate Icing

Icing Sugar                       150 grams

Cocoa                                  2 tablespoons

Melted butter                  1 teaspoon

Warm water                     1 to 2 teaspoons (I actually used 4)

How to make the Icing

  1. Sift icing sugar and cocoa together.
  2. Add melted butter to warm water
  3. Gradually mix into the sugar and cocoa mix until a smooth paste is formed(It should be spreadable not watery)
  4. Spoon it over the cool chocolate cake you made and even it out with the back of the spoon.DONE!!!

Note: This recipe was taken from the Cake Bible from Penguin Books 🙂 You can see the book in the plain cake pic!

Strawberry Jam Tarts

So I was telling you that I did a lot of baking and I posted the Lemon Curd Tarts recipe here…Today, let’s see how you can make the best jam tarts ever!! You can use any flavor of jam…I used a lovely Strawberry jam with real fruit pieces and cute little strawberry seeds 🙂 My nephew loved these tarts!!

Strawberry Jam Tarts

STRAWBERRY JAM TARTS

Ingredients (makes 12)

Refined Flour (maida)            115 grams

Butter                                            60 grams

Baking Powder                           1/4th teaspoon

Cold Water                                   to mix

Sugar(optional)                         5 grams

Jam(any flavor)                        55 grams

How to Make the Jam Tarts

  1. Sift flour and baking powder( there should be no lumps).
  2. Rub in the butter lightly with your fingertips until it looks like breadcrumbs (don’t knead like chapathi dough).
  3. Add sugar if you want and mix thoroughly.
  4. Mix with cold water to form a soft dough.
  5. Roll out on a floured slab or cutting board(don’t roll it out too much-should be thicker than a chapathi) and cut as required. ( I use a small katori (bowl) to cut out a round shape from the rolled dough.)
  6. Line 12 muffin tins or patty tins with the rolled out shapes.
  7. Fill each cup 2/3rds with the jam. Distribute jam evenly in the cups.
  8. Bake in a hot oven at 205 degrees C (400 degrees F) for 15 to 20 minutes.
  9. When baked ( it should look lighter and will be solid not squishy) remove from patty tins and place on a plate to cool completely. You can pop them in the fridge for about half an hour and they’ll taste even better.

Notes: This recipe is similar to the lemon curd tarts just that you bake these tarts with the jam filling in them 🙂 The recipe was taken from The Thangam Philip Book of Baking.